Thursday, August 21, 2014

Layered Blueberry Buttercream and Vanilla Cake


If your buttercream icing is the all-star flavour that you want to highlight, layer it up with thinner pieces of vanilla cake so that your buttercream truly stands out.

How-To: Toss 1 cup of fresh or frozen blueberries (thawed and at room-temperature) into your best buttercream recipe (1/2 cup if it is a small batch of icing).  You can use this recipe for vanilla buttercream icing or the Vanilla Bean Buttercream Icing recipe in this PIECAKEN recipe.

You can also use the vanilla cake recipe from the same page (mentioned above)!  Or use a store-bought mix for vanilla or pound cake.  Just pour 1/2 inch or less of cake batter into the bottom of your 8" pan and bake for only about 12 to 14 minutes.  Bake several layers to get a good height to your cake. Be sure all the layers are cooled before you start layering on your icing.

Because of the fresh/frozen blueberries, you will need to serve and consume this cake within 2 to 3 days at most.  Best if served the same day or within 24 hours.

Decorating Tips:  Cover your cake in a Vanilla Bean Buttercream (see link above to recipe) and then press quality organic white chocolate shavings or chunks into the sides of the cake. Blueberries and white chocolate are a wonderful pairing. Add some shredded coconut for an over-the-top flavour!

Saturday, August 16, 2014

Flourless White Chocolate Cake with Fresh Ontario Peaches

The peaches are ripe in Ontario right now and I was fortunate enough to be given five baskets of them.  So the ideas for recipes began to flow. The result? A flourless white chocolate cake with a white chocolate ganache topping and lightly cooked peaches.  This turned out to be a great pairing, and not overly sweet like many white chocolate desserts can be.

Other bonuses to this cake:  no icing sugar and you can get away with using coconut sugar instead of cane sugar, no nuts (if that's required) and NO WHEAT OR GLUTEN.  You can also change up the topping to any fruit that you like, such as blueberries, strawberries or cranberries.

Here is the recipe:

Flourless White Chocolate Cake with Ripe Peaches Recipe:

For the cake, you need:
  • 10 ounces of white chocolate
  • 1 cup(1/2 lb) unsalted butter
  • 1/2 cup sugar (you can replace with organic coconut sugar)
  • 4 eggs (cold)
  • the scrapings of 1 vanilla bean (or 1/4 tsp ground vanilla bean or 1/2 tsp real vanilla extract)

For the topping, you need:
  • 4-5 cups of pealed and sliced peaches
  • 1/2 cup of sugar (you can replace with agave or organic coconut sugar)
  • 1 tsp cinnamon
  • 1 tbsp. lemon juice

For the white chocolate ganache, you need:
  • 5 ounces of white chocolate
  • 1/4 cup of whipping or heavy cream.


Instructions to make the flourless white chocolate cake:
  1. Prepare a 9" or 10" springform pan by lining the bottom with parchment paper and greasing both the sides and the paper with butter.
  2. Preheat your oven to 350 degrees F.
  3. Chop the butter into cubes and place in a stainless steel or glass bowl over double boiler (a pot with about an inch of steaming (not quite simmering) water in it) on your stovetop.
  4. Add the 10 ounces of white chocolate and stir the butter and white chocolate constantly until it melts together. Take it off the heat while you still have a few lumps in it and stir until smooth. You may experience some separation of the cocoa butter from the white chocolate, which is normal for white chocolate, but your room temperature sugar and cold eggs should recrystallize the cocoa butter and bring the mix back together.
  5. Add the 1/2 cup of sugar and stir.
  6. Add all four eggs at once and immediately - using a hand mixer or stand mixer - blend on low or medium until the mixture is slightly lighter in colour and completely mixed.
  7. Toss in the vanilla bean or extract and stir.
  8. Pour the entire mix into your prepared pan and bake for 25 minutes it looks slightly puffy and cooked on the sides, about 1 inch in from the edges. If should still be jiggly in the middle, but if it still looks too wet and undercooked in the middle, add five more minutes to your cooking time. Then, turn off the oven and let the cake sit with the door closed for 5 more minutes.
  9. Remove from oven.  Let cool for one hour, then refrigerate until cold.
  10. Place your cake on a serving plate and continue to chill until you are ready to top it with ganache.

While your cake is cooking, prepare the peach topping:
  1. Place sliced peaches in a pot with sugar, lemon juice and cinnamon and place on stovetop.  Cook at a slight simmer for 10 minutes.  You can cook for longer (15 to 20 minutes) with 1 tbsp. cornstarch for a thicker, fully cooked topping, if you wish.
  2. Remove from heat and let sit until it cools.  Then refrigerate so that your topping is cold when you place it on the cake.

Once your cake is cold, prepare the white chocolate ganache:
  1. Place your 5 ounces of white chocolate in a microwavable bowl.
  2. Cook on medium power for 1 minute.  Stir until smooth.
  3. Pour the mixture onto the cake and spread just to the edges.
  4. Chill the cake for at least 1 hour before adding the peach topping.
  5. Once chilled, top with the now-cold peach topping.  You can decorate it with swirls of melted white chocolate or chocolate shavings, or whatever you like! 

You can cut this cake in quarters, then cut each quarter piece into 3 slices to get a good-sized piece per serving. Since this cake is rich, you can also cut the cake in quarters, and then cut each quarter into 4 pieces to get 16 small servings.

Best served within 1 to 2 days. Consume within 4 days.

Monday, August 11, 2014

Wedding Cake with Lilac-Coloured Cascading Flowers


This summer, I made a wedding cake that had a bright and cheery feel with its lilac-coloured flowers that cascaded down a white, three-tier wedding cake. Below is a photo-guide as to how I decorated this cake, to give you ideas and instruction on how to make a similar cake.

What's inside?  The top two tiers had milk chocolate chunks sprinkled on a rich peanut butter buttercream icing between layers of moist chocolate cake.  The bottom tier had five layers of vanilla cake layered with a real-butter and naturally flavoured raspberry buttercream icing.

The chocolate and vanilla cupcakes were topped with a rich vanilla buttercream icing. For the icing recipe, click here.

So how did this cake come together?  Here is the visual guide:


Start with baking and layering the 14" Bottom Tier - and don't forget the vanilla crumb-coat!Vanilla Cake
Next up - layer and crumb coat (thin layer of icing refrigerated until hard, before adding an outer layer of vanilla icing and then finally covering in fondant) the 10" second tier.
Finally layer and crumb coat the top 6" tier.
Cover each tier separately in rolled fondant (also called 'decorice' icing).  Seal the tiers together with royal icing.


Smooth the royal icing seal with a spatula or gloved finger to get a flat look (so your ribbon will be smooth and flat).


Add straws or wooden dowels to the bottom and second tier to support the top two tiers of the cake.  Distribute evenly so the top tiers don't tip. The refrigerate the cake for two hours or more while you make the flowers to harden up the icing before adding the ribbon and flowers.


Be sure to have your gum paste on hand at room temperature. Use colour gels to get the right shade.

The Wilton Gum Paste Flower set will give you a lot of options for flower types, including roses and Calla Lilies. 

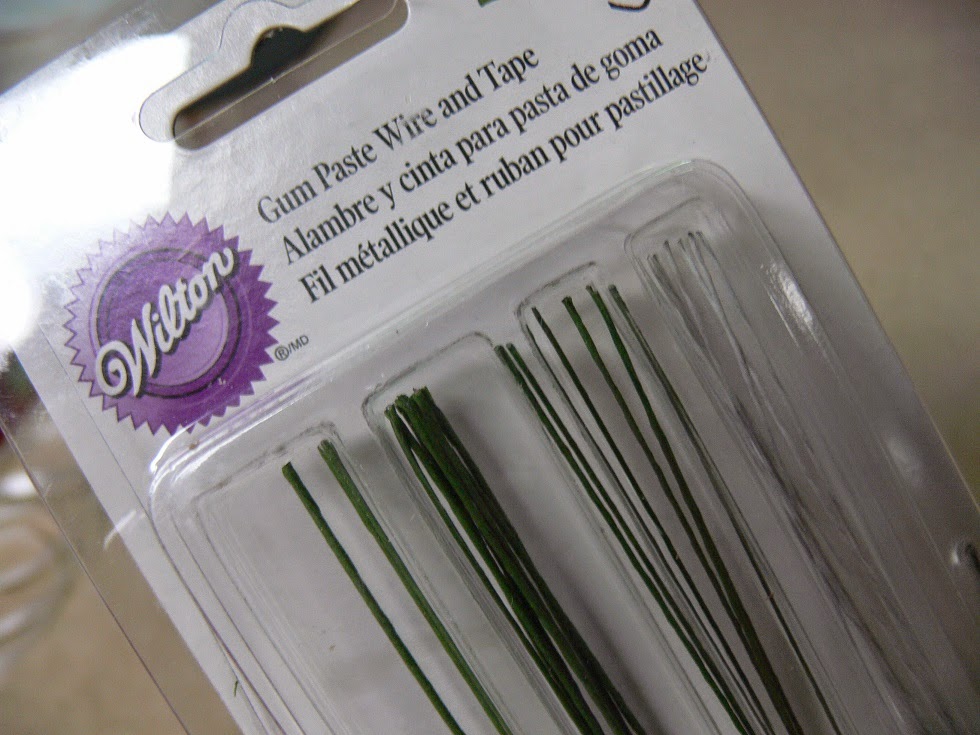
Wire for gum paste flowers makes it easier to add stems and hand your flowers upside-down to dry.


Once you have made your flowers, hang them to dry.  Don't have a drying rack?  Get creative and use knobs or hang a string across your kitchen to hang them off of.
Cut a variety of flowers to fill in open and empty spaces.

Make a variety of roses and flowers and vary the colour slightly to add a more appealing visual effect.
Let them dry and harden overnight.
Add the ribbon by wetting the entire piece (wetting the whole thing gives it a consistent colour) and then smoothing it onto the cake with a brush.  Be sure to have the seam at the back of the cake or where your cascading flowers will cover it.
Start to add the flowers. You can use yellow food colouring and a paint brush to colour in the  centre of daisies.

Attach your flowers with stiff white royal icing.

Let the royal icing harden in the fridge overnight to ensure the flowers do not fall off!

Bring along extra gumpaste flowers to lay on the table during set-up to extend your cascade.

Friday, August 8, 2014

3D Spiderman Cake for a Superhero-Themed Birthday Party


My daughter asked me for a Spiderman-themed birthday party for her fifth birthday. Although it was not your typical 'girl-themed' party, it was just as fun for me to create as it was for the kids to participate.

Since I live in a rural area with limited access to theme decorations, I had to expand the party to a general 'superhero' theme with a focus on Spiderman. From there, I was able to find Spiderman badges online that I cut out, purchase Superman-themed napkins and plates, and I hand-made superhero masks for the kids to wear.  But the real highlight was the 3D Spiderman cake.  The kids loved it!


How did I make it?
I baked some of the batter in two small bowls to get the round part of the head, and also 5" cake pans to layer between the rounded pieces.  Only a little carving was necessary. 

The bottom of the cake was also baked in a bowl to get the rounded look.  Straws were used in the bottom cake to support Spiderman's head, which had been decorated on a piece of cardboard cake round that I had cut to fit.  So the straws held up the cake round, which in turn held up Spiderman's head.

In retrospect, I would have made his head a bit longer and his shoulders a bit shorter to get a better replica, but I made the shoulders larger to ensure there would be enough cake to eat. I focused on getting the eyes just right (according to online pictures).

Edible marker, purchased at Michael's in the baking section, was used with a ruler to get the lines on his face, which I then covered in long rolled-out pieces of black fondant. Edible gold glitter and gold edible spray was used for his eyes. The hand was made out of Rice Krispie treats then covered in icing and fondant.

What's inside?
Banana cake with peanut butter icing and milk chocolate chips.