Monday, March 31, 2014

Black-and-White Themed Wedding Cakes & Cupcakes - A Consistent Look from Start to Finish

A wedding theme is an idea that consistently runs through every element of a wedding, from start to finish.  It can be a colour scheme, a concept or a symbol.  And it can be anything from motorcycles to roses. Some wedding couples want their theme to be as simple as an overall look that is consistent throughout the wedding.  The cake falls within that theme and, in order to be memorable, it should fully encompass it. 

I assisted a few brides who simply wanted a black-and-white themed wedding.  That colour scheme makes it easy when choosing the wedding dress, tuxedos and bridal party outfits.  But it must also start right from the invitations and follow through to the decorations and the cake. Here are some examples of Black and White Themed Wedding Cakes that I have made....

Black-and-White Themed Wedding Cake with Fresh Flowers:


This black-and-white themed wedding cake matched the colour scheme and the pattern on the invitations that the bride chose.  Fresh flowers added to the outdoor setting of the wedding.

The cake was wrapped in vanilla-flavoured white fondant and the decorations were done with black-coloured fondant and stuck on with a little water.  Black satin ribbon completed the look. As a bonus, an extra bouquet of the brides flowers had been ordered to be used on the cake.

What's inside?  Whole cherries swirled into a rich buttercream icing with a touch of real vanilla flavouring layered between chocolate cake (bottom tier) and vanilla cake (top two tiers). Some dark chocolate truffle accompanied the chocolate cake layers. 


Black-and-White Vintage Themed Cake and Cupcake Display:

This cake and cupcake display was fun to make because the bride pre-set the cake display table for me and utilized beautiful vintage-style black and white boxes to create an eye-catching display of cupcakes.  The cake topper matched the overall theme, and the swirls on the cake were consistent with the wedding invitation.


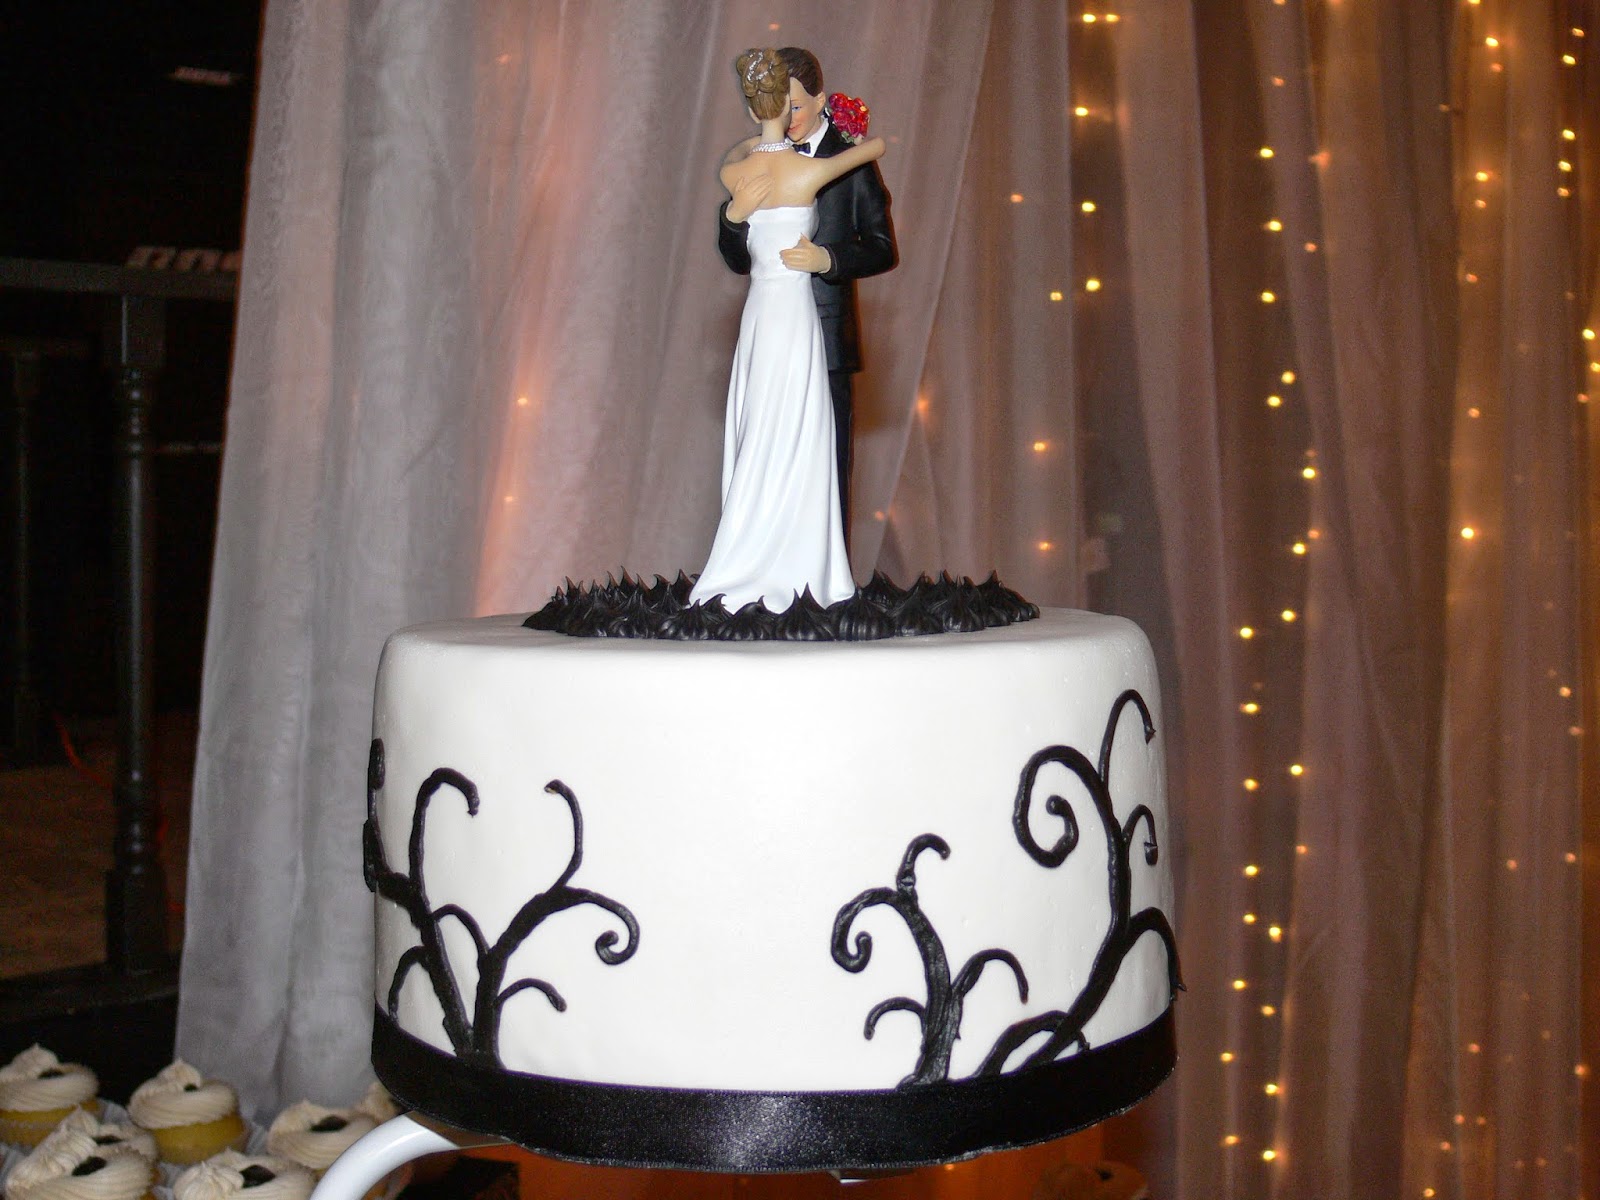
For the cupcakes, a vanilla icing made with lard (instead of butter) was used to get a super-white vanilla icing that was all natural. A touch of black food colouring was added to a very dark chocolate truffle to achieve the black colour without losing any of the rich flavour.

Black fondant and ribbon completed the look to match the pattern on the invitations

What's inside the cake topper?  Peanut Butter Buttercream and Organic Milk Chocolate Chunks between several layers of chocolate cake. A favourite flavour of both the bride and groom!

Something to think about:

How does your black-and-white theme play out in your wedding cake? Does it match the invitations? The table covers and the centre-pieces? And how does the colour scheme and design of the cake  touch every other element of your wedding?

Friday, March 28, 2014

Spring Wedding Cake with Pink Flowers, Candy Pearls and Green Ribbon

This Spring Wedding Cake was bright, fun and delicious!

With a pink-and-green theme, this cake brought out a Spring-time feel. A variety of pink flowers made out of gum paste and edible food spray assisted in matching the wedding theme and colours. The Wilton Flower cutter 'kit' was a great help for this cake.

The Pearl-White Candy Beads by CK Products (www.ckproducts.com) added a touch of elegance.

What's inside this cake? 

Top two tiers: Five layers each of moist Vanilla Cake. In between the layers of cake was organic white chocolate chunks and thick raspberry buttercream icing.

Bottom tier: Three thick layers of moist Sour Cream Chocolate Cake with caramel buttercream and chunks of organic milk chocolate between the layers.

A coating of vanilla buttercream was applied to all the tiers before covering them in fondant to help the fondant stick and keep the fondant looking bright white!

More Monkeying Around...A Fun Kids' Birthday Cake

This fun Monkey Cake was made to match the birthday party theme of a little girl who turned 3 in March.

What's inside of this cake would delight any monkey or kid alike:  Three layers of all natural Chocolate-Chip Banana Cake and Chocolate Buttercream Icing. Just take your usual banana bread recipe and split it among three 8" pans (or 1 pan filled with batter and baked 3 times).  Kids and adults love banana bread, so this cake was a hit all around. Yum!

The children really loved eating the balls of yellow fondant that I placed around the base of this cake (they find them fun to play with and to eat!).  And the yellow colour gave the cake a Spring-time feel.

The cake also nearly matches the Monkey Cupcakes in the previous article!  To make an impressive display for a large party, make a similar 8" round cake, and place it on the top layer of a cupcake stand. Then place matching monkey-face cupcakes on the bottom layers for a unique and fun tiered display.

Tuesday, March 25, 2014

Cupcakes for Kids: Panda Cupcakes and Moneky Cupcakes

Decorating cupcakes for children's birthday parties are fun; there are so many colour options and so many different ways to decorate them! 

I was asked to make cupcakes for the birthday party of twin girls. One of the girls liked vanilla cake and panda bears, but her sister liked chocolate cake and monkeys. So I gave them both! Cupcakes are a great way to individualize the dessert for each birthday girl.

Both animals were quite easy to make using coloured fondant. For the monkey cupcakes I mixed skin-coloured food colouring into white fondant to create the facial features (I may have added a drop or two of brown food colouring). I used chocolate fondant for the rest of the head.  This created a nice contrast and black edible marker completed the look. 

To speed up the process of cutting the rounded heart shape for the monkeys' faces, you can use a heart-shaped cutter, then use a rounded cutter (or a round drinking glass turned upside down) to trim off the heart's point to round out the monkey's chin.


For the panda cupcakes, white and black fondant is all you need!  Simply use a drinking glass, bowl or cutter in the same size as the cupcakes to cut fondant circles.  Then cut two upper edges off to create the shape of the head (as indicated in the picture to the right).

Use the back end of a large piping tip to cut the half circles for the ears. To cut the egg shape of the eyes, I used the back end of a small metal piping tip, which was already squished into the right shape (thanks to my dishwasher!).

Fondant is time-consuming when making cupcakes, but well worth it! 

And be sure to add a nice layer of buttercream or chocolate truffle under the fondant for taste. You can even scoop out a portion of the cupcake and add chocolate truffle, icing with chocolate chips, pudding or whatever filling you like to increase the tastiness of your cupcakes. Click here for a great milk chocolate truffle recipe.

Happy Baking!

Dark Chocolate Truffle Icing Recipe & a Discussion About All Natural Buttercream Icing

I believe in eating food that is all natural, a belief that came about after spending a school year in France and hours in French grocery stores reading ingredient labels.  After comparing those labels to North American ones, I finally determined that a mixture of portion control and all-natural eating was the reason why French women and men were so slender. So my baking - and eating - habits changed after that year.  Now I make cakes and cupcakes as natural as possible.  If a theme is a must, of course some coloured fondant is necessary.  But when it comes to buttercream, why not use the natural flavours of food to colour the cupcakes?

Choose a buttercream recipe that is all natural (and make sure to read your butter label to ensure no artificial flavours or colours have been added). 

Then simply swirl real raspberries into your favourite buttercream recipe to get a brilliant pink colour that is just right for a little girls' birthday party or a girl baby shower.  Don't want the seeds? Simply mash your raspberries through a strainer first, before adding them to the icing mix.

Use real vanilla extract or vanilla bean scrapings for vanilla cupcakes.  No one cares if your cupcakes are not pure white, which they won't be anyway if you are using real butter.  If you really need them to match a wedding cake, then use all natural lard instead of butter (watch out for hydrogenated shortening - lard may not be good for you, but at least it is natural and non-hydrogenated).  For flavour, forget the vanilla and instead, soak the rind of a lemon or lime in your icing sugar for 24 hours before making your icing, which will add a wonderful flavour without any added colour.

Chocolate cupcakes can be a variety of chocolate colours.  If you need them to be dark and as close to black as possible, use a really dark cocoa powder (check websites like www.vanillafoodcompany.ca for Cacao Barry's extra dark chocolate cocoa powder), or simply make a dark chocolate truffle as your icing using 70% or darker chocolate, as per the recipe here:

Dark Chocolate Truffle Icing Recipe:

1. Place 1 cup of whipping cream in a small saucepan on the stovetop on medium heat.

2. When it just about reaches the boiling point, pour it over a bowl of chopped 70% dark chocolate and stir until all the chocolate is melted. 

3. Let set on counter for 6 to 8 hours and use at room temperature.

4. Once it is set (slightly stiff or solid), pipe it onto cupcakes using a piping bag. Warm the bag with your hands or in the microwave for 3 to 5 seconds to make it easier to pipe.

Tip: Don't have piping bags or tips? Simply place your truffle mix into a strong medium or large Ziplock bag and cut a round hole on one of the corners.  Pipe directly onto cupcakes in a circular or squiggly motion to get the look that you want.

Thursday, March 20, 2014

Hey Groundhog! When did you say Spring would arrive?


I am not sure what the Groundhogs told us about the arrival of Spring this year, but looking outside this morning - on the first day of Spring - told me that Spring HAS NOT ARRIVED.  However, maybe this Groundhogs Day Wedding Cake can put a 'spring' in our step and give us hope that Spring will come to Canada soon.


The Groundhog head was made out of rice treats (Rice Krispies & marshmallows) that I partially hand-molded and molded using rounded bowls.  I further refined the shape by carving with a small knife.

His nostrils were made with two coffee beans, and for his eye balls, I used dark chocolate-covered hazelnuts. I used a dark chocolate toffee (from my chocolate TOFFLE mix) for his nose and hands. And a little white fondant was applied to his upper lip to smooth it and fill him out a bit.

The bride had wanted the Groundhog to be popping out of the snow, but we needed a minimum amount of cake to feed the 30-50 guests, so the 'snow mound' was a very tall chocolate cake that had six layers of moist cake, and real buttercream and chocolate chunks between each layer.

The snow balls at the base of the cake were made of fondant.  The large ones had pieces of cake in the centre, so they could be eaten.  The flowers and grass at the base of the cake were added to indicate that spring was on its way (like the blooming of a new love, I know, awwww). They were also made with coloured fondant. Finally, brown sugar was added to indicate the sand that came up with the groundhog as he tunneled through the earth to come out of the snow.

The groundhog's head was covered with a rolled fondant that I coloured with just a little tan-brown colour. Then to texture the groundhog, I first used a small knife to add 'hair' texturing to his fur.  Then I used a small paintbrush to paint on a black and brown food colouring and dry cocoa powder. 

The cake was a hit at this non-traditional wedding.

Happy Spring Everyone!